Introduction
A Toast is a pop-up message, which allows you to quickly notify the user of some event. E.g. saving settings to an SD Card.
Toast’s distinctive feature is the ability of the user to interact with either the Activity behind it or the Home Screen, while the message is still displayed. It is also noteworthy that the user can't dismiss a Toast using hardware “Back” key or other methods. A message smoothly fades in and then smoothly fades out. The duration between these fades can be set programmatically. In most cases, Toast is just a short message, but you can also create a custom view for it. For example, an image next to the text. Toast’s position on the screen can be controlled as well. Toast can be created from either Activity or Service. If a Toast is created from Service, it is displayed in front of the Activity, which now has the focus, or on top of the Home Screen.
Creating a Standard Toast
A standard Toast can be created by calling a static makeText method of a Toast class.
Toast.makeText(getApplicationContext(), "Hello, The Code Project!",
   Toast.LENGTH_SHORT).show();
Application context, the message itself and the duration of the Toast are passed as parameters. You can set the message text as either text or as a resource storing a string to be displayed. In our case,R.string.hello_codeproject resource contains the “Hello, The Code Project!” string. The duration can be either short - LENGTH_SHORT or long - LENGTH_LONG. By default, the duration is set to short. You can programmatically set the duration by calling the setDuration method.
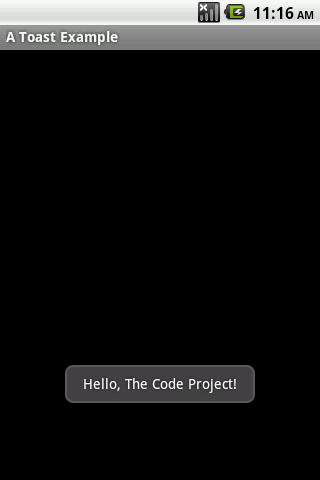
The logic behind makeText method is pretty easy: a Toast object is created and then message text and duration are set. After that, you can either call show method to display the newly created Toast, or set some additional properties, like its position on the screen or a custom view for a Toast. Newly created Toast is shown in the figure below:

Settings the Position of a Toast on the Screen
You can set the position of a Toast on the screen by a call to setGravity method:
Toast toast = Toast.makeText(getApplicationContext(),
   "Hello, The Code Project!", Toast.LENGTH_LONG);
toast.setGravity(Gravity.CENTER, 0, 0);
toast.show();
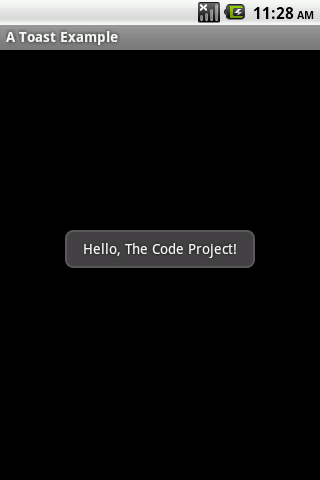
The first parameter is used to set the gravity itself (there is a full set of those in Gravity class). Second and third parameters define by how many pixels, relative to the value set in the first parameter, should the Toast be offset. The result of executing the code above is shown in the figure below:

Adding an Image to the Standard Toast
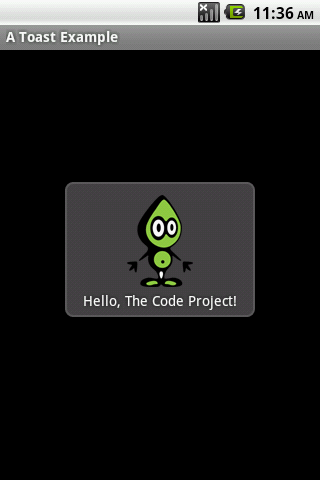
In order to add an image to the standard Toast, you first need to create an ImageView object, and set its image from the resources using the setImageResource method. You then need to get the standard view (which is actually a LinearLayout) and add the newly created ImageView object to it. The position, into which the image needs to be inserted, also should be set (in our case 0 is used, so that the image is displayed over the text). Code for this is shown below:
Toast toast = Toast.makeText(getApplicationContext(),
   "Hello, The Code Project!", Toast.LENGTH_LONG);
toast.setGravity(Gravity.CENTER, 0, 0);
LinearLayout toastView = (LinearLayout) toast.getView();
ImageView imageCodeProject = new ImageView(getApplicationContext());
imageCodeProject.setImageResource(R.drawable.codeprojectlogo);
toastView.addView(imageCodeProject, 0);
toast.show();
Toast created this way is shown in the figure below:

Creating a Toast with Custom Layout
In order to create a Toast with custom layout, we first need to create that layout itself. Its code is shown below:
="1.0" ="utf-8"
<LinearLayout
xmlns:android="http://schemas.android.com/apk/res/android"
android:layout_height="wrap_content" android:layout_width="wrap_content"
android:background="#ffffffff" android:orientation="vertical"
android:id="@+id/llToast" >
<TextView
android:layout_height="wrap_content"
android:layout_margin="1dip"
android:textColor="#ffffffff"
android:layout_width="fill_parent"
android:gravity="center"
android:background="#bb000000"
android:id="@+id/tvTitleToast" />
<LinearLayout
android:layout_height="wrap_content"
android:orientation="vertical"
android:id="@+id/llToastContent"
android:layout_marginLeft="1dip"
android:layout_marginRight="1dip"
android:layout_marginBottom="1dip"
android:layout_width="wrap_content"
android:padding="15dip"
android:background="#44000000" >
<ImageView
android:layout_height="wrap_content"
android:layout_gravity="center"
android:layout_width="wrap_content"
android:id="@+id/tvImageToast" />
<TextView
android:layout_height="wrap_content"
android:paddingRight="10dip"
android:paddingLeft="10dip"
android:layout_width="wrap_content"
android:gravity="center"
android:textColor="#ff000000"
android:id="@+id/tvTextToast" />
</LinearLayout>
</LinearLayout>
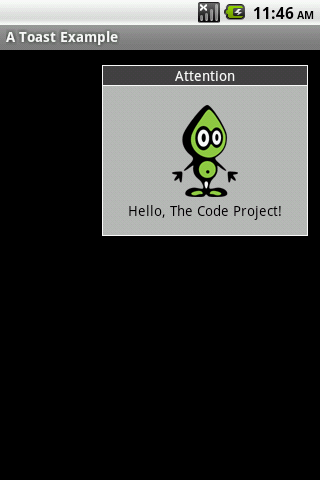
The Toast we created looks like a dialog with a header, an image and a message. We now need to set the layout that we created to the Toast. We should also set the dialog title, the message text and the image. This is how we do it:
LayoutInflater inflater = getLayoutInflater();
View layout = inflater.inflate(R.layout.customtoast,
   (ViewGroup) findViewById(R.id.llToast));
ImageView image = (ImageView) layout.findViewById(R.id.tvImageToast);
image.setImageResource(R.drawable.codeprojectlogo);
TextView title = (TextView) layout.findViewById(R.id.tvTitleToast);
title.setText("Attention");
TextView text = (TextView) layout.findViewById(R.id.tvTextToast);
text.setText("Hello, The Code Project!");
Toast toast = new Toast(getApplicationContext());
toast.setGravity(Gravity.RIGHT | Gravity.TOP, 12, 40);
toast.setDuration(Toast.LENGTH_LONG);
toast.setView(layout);
toast.show();
The first two lines initialize the View object by inflating the layout from an XML file (we use an instance ofLayoutInflater class, returned by getLayoutInflater, to do that). The first parameter to inflate method sets the id of the layout created earlier - R.layout.customtoast (it matches the res/layout/customtoast.xml file). We then get the references to the image, header title and message text, and fill them with the appropriate data. Finally, we create a Toast itself, set all the required parameters as well as the layout we created earlier (it’s done using setView method). As a result, we get a Toast shown in the figure below:

Calling a Toast from Another Thread
To call a Toast from another Thread, you need to define a property of Handler type in your class:
Handler handler = new Handler();
Now, let’s assume that you have a Thread, in which you need to call a method that displays a Toast:
 Collapse | Copy Code
new Thread(new Runnable() {
   public void run() {
      showToast();
   }
}).start();
In this case, the method will be executed in a separate Thread. But because a Toast can only be displayed in the main Thread, you will get an error when you try to run this.
If you need to execute in the main Thread, when calling from a separate Thread, you need a Handler, that was defined earlier. You can display a Toast from newly created Thread in this way:
public void showToast() {
   handler.post(new Runnable() {
      public void run() {
         Toast.makeText(getApplicationContext(),
            "Hello, The Code Project!", Toast.LENGTH_SHORT).show();
      }
   });
}