Phần 1: Cài đặt và sử dụng Android với Eclipse
Phần 3: Xây dựng giao diện đơn giản
Phần 6: Service
Phần 8: Content Provider
1. Giới thiệu Content Provider
Content Provider là 1 trong 4 thành phần cơ bản của 1 ứng dụng Android thường có bao gồm:
Một Content Provider cung cấp một tập chi tiết dữ liệu ứng dụng đến các ứng dụng khác. Thường được sử dụng khi chúng ta muốn tạo cơ sở dữ liệu dưới dạng public (các ứng dụng khác có thể truy xuất ).
Dữ liệu thường được lưu trữ ở file hệ thống, hoặc trong một SQLite database.
Đơn giản để các bạn có thể hình dung như : Danh bạ, Call log, cấu hình cài đặt...trên điện thoại là dữ liệu dưới dạng Content Provider.
Content Provider hiện thực một tập phương thức chuẩn mà các ứng dụng khác có thể truy xuất và lưu trữ dữ liệu của loại nó điều khiển.
Tuy nhiên, những ứng dụng không thể gọi các phương thức trực tiếp. Hơn thế chúng dùng lớp Content Resolver và gọi những phương thức đó. Một Content Resolver có thể giao tiếp đến nhiều content provider; nó cộng tác với các provider để quản lý bất kỳ giao tiếp bên trong liên quan.
Đơn giản hơn, chúng ta có thể làm 1 ứng dụng nhỏ để lấy tất cả các thông tin cấu hình trong máy load lên listview.

Chúng ta có thể tìm hiểu sơ qua về code của demo này, rất ngắn gọn
import android.app.Activity;
import android.content.ContentResolver;
import android.database.Cursor;
import android.os.Bundle;
import android.provider.Settings;
import android.widget.ListView;
import android.widget.SimpleCursorAdapter;
public class ContentUserDemo extends Activity {
private static final String TAG = "ContentUserDemo";
/** Called when the activity is first created. */
public void onCreate(Bundle savedInstanceState) {
super.onCreate(savedInstanceState);
setContentView(R.layout.main);
// Get content provider and cursor
ContentResolver cr = getContentResolver();
Cursor cursor = cr.query(Settings.System.CONTENT_URI, null, null, null, null);
// Let activity manage the cursor
//Lớp Content Resolver cung cấp các phương thức xử lý dữ liệu thông qua các Uri, mỗi Content Provider có 1 Uri cụ thể,
//ở đây Uri Settings.System.CONTENT_URI sẽ trả lại tập dữ liệu là thông tin cấu hình của thiết bị.
//Sau khi lấy được con trỏ tới tập dữ liệu, việc còn lại đơn giản là bind data lên listview để hiển thị:
startManagingCursor(cursor);
Log.d(TAG, "cursor.getCount()=" + cursor.getCount());
ListView listView = (ListView) findViewById(R.id.listView);
String[] from = { Settings.System.NAME, Settings.System.VALUE };
int[] to = { R.id.textName, R.id.textValue };
SimpleCursorAdapter adapter = new SimpleCursorAdapter(this, R.layout.row, cursor, from, to);
listView.setAdapter(adapter);
<?xml version="1.0" encoding="utf-8"?>
<LinearLayout
xmlns:android="http://schemas.android.com/apk/res/android"
android:orientation="vertical"
android:layout_width="fill_parent"
android:layout_height="fill_parent">
<ListView
android:layout_width="fill_parent"
android:layout_height="wrap_content"
android:id="@+id/listView"></ListView>
</LinearLayout>
row.xml
<?xml version="1.0" encoding="utf-8"?>
<LinearLayout
xmlns:android="http://schemas.android.com/apk/res/android"
android:layout_height="wrap_content"
android:padding="5sp"
android:layout_width="fill_parent">
<TextView
android:layout_height="wrap_content"
android:id="@+id/textName"
android:text="Name"
android:textSize="18sp"
android:layout_width="fill_parent"
android:layout_weight="1"></TextView>
<TextView
android:layout_width="wrap_content"
android:layout_height="wrap_content"
android:id="@+id/textValue"
android:text="Value"
android:textSize="18sp"
android:gravity="right"></TextView>
</LinearLayout>
2. Tạo và sử dụng 1 Content Provider do người dùng tự định nghĩa
Trong Project mình tạo 1 Content Provider Books, mỗi bản ghi Book bao gồm 2 trường : ID và Title.
Sau đây là các bước để tạo 1 Content Provider cơ bản ( cụ thể là tạo ContentProvider Book)
1. Tạo 1 class thừa kế lớp ContentProvider
public class BookProvider extends ContentProvider
2. Định nghĩa 1 biến Uri (public static final ) được gọi CONTENT_URI. Các xâu này luôn được bắt đầu bằng “content://” tiếp theo đó là nội dung của mà ContentProvider xử lý. Xâu này phải có đặc tính là duy nhất.
public static final String PROVIDER_NAME = "at.exam.Books";
public static final Uri CONTENT_URI = Uri.parse("content://" + PROVIDER_NAME + "/books");[/CODE]<b>3.</b> Khai báo các xâu để định nghĩa cho từng thuộc tính tương ứng với các cột giá trị từ Cursor.
[CODE] public static final String _ID = "_id";
public static final String TITLE = "title";
3. Chúng ta cần tạo hệ thống chứa dữ liệu cho ContentProvider, có thể chưa dưới nhiều hình thức : sử dụng XML, thông qua CSDL SQLite, hay thậm chí là WebService. Trong Demo này chúng ta sử dụng cách phổ biến nhất đó là SQLite:
private SQLiteDatabase bookDB;
private static final String DATABASE_NAME = "Books";
private static final String DATABASE_TABLE = "titles";
private static final int DATABASE_VERSION = 1;
4. Định nghĩa tên của các cột mà chúng ta sẽ trả lại giá trị cho các clients.Nếu chúng ta đang sử dụng Database ContentProvider hay các lớp SQLiteOpenHelper, tên các cột này chính là id của các cột trong cơ sở dữ liệu SQL. Trong trường hợp này, chúng ta phải gộp cả cột có giá trị là số nguyên được gọi “_id” để định nghĩa id của mỗi bản ghi. Nếu đang sử dụng cơ sở dữ liệu SQLite, nó sẽ là INTEGER PRIMARY KEY AUTOINCREMENT. Tùy chọn AUTOINCREMENT không bắt buộc, có tác dụng tự động tăng ID của mỗi bản ghi lên nếu người dùng không nhập. Android cung cấp SQLiteOpenHelper giúp tạo và quản lý các phiên bản của cơ sở dữ liệu.
private static final String DATABASE_CREATE =
"create table " + DATABASE_TABLE +
" (_id integer primary key autoincrement, "
+ "title text not null);";
private static class DatabaseHelper extends SQLiteOpenHelper
{
public DatabaseHelper(Context context) {
super(context, DATABASE_NAME , null, DATABASE_VERSION);
}
@Override
public void onCreate(SQLiteDatabase db) {
db.execSQL(DATABASE_CREATE);
}
@Override
public void onUpgrade(SQLiteDatabase db, int oldVersion, int newVersion) {
db.execSQL("DROP TABLE IF EXISTS titles");
onCreate(db);
}
}
5. Nếu chúng ta muốn public các dữ liệu kiểu byte như bitmap thì các trường mà chứa dữ liệu này nên là một xâu với 1 content://URI cho file đó. Đây chính là liên kết để các ứng dụng khác có thể truy cập và sử dụng dữ liệu bitmap này.
6. Sử dụng Cursor để thao tác trên tập dữ liệu : query (), update(), insert(), delete()….. Có thể gọi phương thức ContentResolver.notifyChange() để biếtkhi nào dữ liệu được cập nhật.
Add Book
@Override
public Uri insert(Uri uri, ContentValues values) {
long rowID = bookDB.insert(DATABASE_TABLE, "", values);
if(rowID > 0)
{
Uri mUri = ContentUris.withAppendedId(CONTENT_URI, rowID);
getContext().getContentResolver().notifyChange(mUri, null);
return mUri;
}
throw new SQLException("Failed to insert new row into " + uri);
}
Get All Books
@Override
public Cursor query(Uri uri, String[] projection, String selection,
String[] selectionArgs, String sortOrder) {
SQLiteQueryBuilder sqlBuilder = new SQLiteQueryBuilder();
sqlBuilder.setTables(DATABASE_TABLE);
if(uriMatcher.match(uri) == BOOK_ID)
sqlBuilder.appendWhere(_ID + "=" + uri.getPathSegments().get(1));
if(sortOrder == null || sortOrder == "")
sortOrder = TITLE;
Cursor c = sqlBuilder.query(bookDB, projection, selection, selectionArgs, null, null, sortOrder);
c.setNotificationUri(getContext().getContentResolver(), uri);
return c;
}
}
Mình chỉ demo 2 chức năng là thêm sách và lấy toàn bộ bản ghi trong CSDL , ngoài ra các phương thức edit, sửa , update, xóa... các bạn có thể tự làm .
7. Khai báo Content Provider trong file AndroidManifest.xml
<provider android:name = "BookProvider"
android:authorities="at.exam.Books" />
Như vậy chúng ta đã tạo xong ContentProvider Book tự định nghĩa.
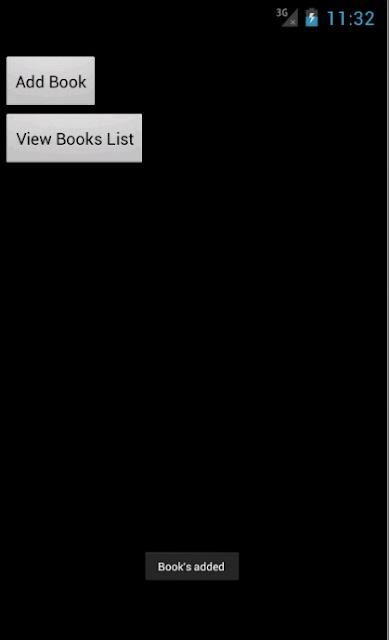
8. Test thử thành quả :
Mỗi content Provider gắn với 1 Uri cụ thể, như trên thì ContentProvider Book có Uri là:
at.exam.Books/books
Để test thử , vẫn trong Project Demo ContentProviderDemo , các bạn có thể thêm 2 Button Add Book và View All Books vào . Giao diện như sau: